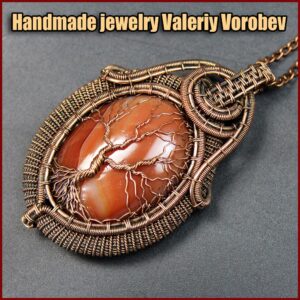
Wire wrap rings tutorial free. How to wrap stones with wire for jewelry. How to make a simple wire wrap rings.

Table of Contents
How to start wire wrapping stones. Adjustable wire wrap rings tutorial.
Wire wrapping is one of the oldest techniques for making handmade jewelry. As a matter of fact, wire and beaded jewelry made using wire wrapping techniques date back to thousands of years BC.
The technique of creating wire jewelry is done with some jewelry wire and material similar to wire. Wire components are then connected to one another using a variety of mechanical techniques with no soldering or heating of the wire. Frequently, in this approach, a wire is bent into a loop or other decorative shape and then the wire is wrapped around itself to finish the wire component making that loop or decorative shape permanent.
Because of this technique for wrapping wire around itself, this craft is called wire wrapping.

Wire wrapping and wire work is a popular jewellery making technique that opens doors to a whole array of beautiful jewellery designs without the need for lots of tools. These techniques can incorporate anything from gemstone beads, gemstones cabochons to charms and just pure wire work.
How to wire wrap rings. Basic Wire Wrapping Tools
Tools You Need To Make Wire Wrapped Jewelry For Yourself Or To Sell
When you’re starting our to make your own jewelry, you will need a few basic tools for wire wrapping jewelry, especially if this particular technique is something you want to get into. While the entry level is very low in terms of what tools you need, there are no two ways about it: you do need a few things to get going.
Round nose pliers – for shaping and bending wire
Side cutters – for cutting wire
Snipe nose pliers (also known as chain nose pliers) – great all-purpose pliers, good for shaping and getting to hard to reach places
Flat nose pliers – helps to create sharp corners in the wire

Copper wire for jewelry.
For a variety of purposes, copper is a common metal for jewelry production. It has a lovely color and many possibilities for patination. It’s easy to use and relatively inexpensive to obtain. Copper is also recommended as a good material for beginners who want to learn working with wire. It allows you to gain lot of experience before you upgrade to the more costly sterling silver.

Copper wire is one of my favorite products, and I use it often to make jewelry. Copper wire is used in nearly all of my tutorials.
This tutorial is suitable for beginners. You can practice making different weavings. You also can learn to bend the wire. You can try patinating and polishing the copper wire.

Wire wrap rings tutorial.
For the ring, we will use 1mm and 0.4mm copper wire. Select the size of the wire for the ring individually.

You will need a natural stone bead with a diameter of 8-10 mm.
Weave two thick wires together in any way you want. The ruler in my photo is in mm.

Use round nose pliers to gently bend the wire on one side.

On the other side, secure the bead with a hole.

Next, we need a special crossbar or take any round stick of a suitable size.

Bend the workpiece around the crossbar. Our ring is almost ready!

Patinate the wire
I like to “age” the wire. I mean, I like to patinate the wire and then polish it.
There are many ways to patinate a wire. For example, sulfuric liver can be used. You can buy and use ready-made wire blackening solutions.
I often use ammonia to patinate copper wires. In Russia, bottled ammonia is sold in pharmacies. I pour ammonia into a glass jar. I hang the product above the solution. The decoration must not touch the ammonia surface! After a few minutes, the copper begins to darken and takes on a beautiful brown color.
Observe safety precautions when working with ammonia!
Then I polish the piece. I use special machines with felt mugs. I also use polishing pastes.
Copper darkens over time. To prevent this from happening, the product can be varnished.

You can come up with something complicated. For example, you can make a ring with three main wires according to the same principle.

Making your own jewelry is fun, satisfying, and can also be lucrative. You can design jewelry in a range of designs and with amazing techniques that yield a variety of looks.
Some DIY jewelry types, such as beautifully twisted wire patterns, tend to be very difficult, but with a little patience, you may be shocked to discover how simple they are!
Jewelry creation is a talent that can be mastered and loved for a lifetime. About 1000 delighted students are now having a good time wire wrapping and receiving compliments on their exclusive handcrafted pieces.
Also, check out Wire wrapping pendant tutorials:
Wire wrapped tutorials PDF Valeriy Vorobev
You can find me on Facebook, Pinterest, YouTube, Instagram . You can find my textbooks on such Internet shops as Etsy and Amazon.


